Visual reference
In this chapter you get instructions (skipping long-winded explanations), showing how to operate CODA run-control. A picture is worth a thousand words.
Run control software, including run control graphical interface (UI and in some places rcGUI) has gone through multiple revisions. So, This chapter will use the latest version of the run-control software to teach how to use the CODA run-control UI.
How to start a run control?
Before you start a run-control you have to make sure you set the following environmental variables:
- $CODA: CODA distribution directory, where CODA software package is unpacked.
- $COOL_HOME: Directory where CODA run control system description files are located.
- $EXPID: The global name space of the control system, for e.g. Hall-D
- $SESSION: The user of the control system. Note that CODA run-control allows multiple parallel running sessions within the same expid.
To activate a run-control system you run executable called platform (make sure you putting $CODA/bin into your executable path, i.e. $PATH)
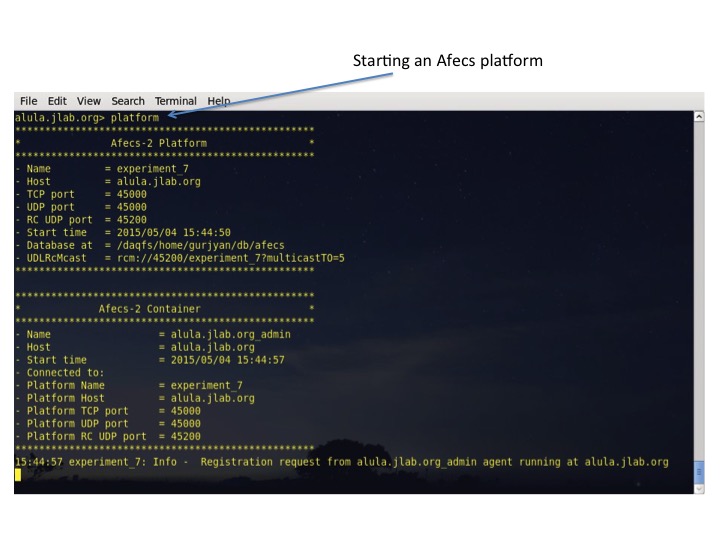
Now you can start CODA components, such as ROCs, EMUs, etc. Components will connection to the run-control platform, requesting a representative agent on the platform. You can see messages of these startup processes on the platform console.
How to start a run control user interface?
CODA run-control user interface is a thin layer on top of the Afecs control platform. This layer communicates with the platform and it's agents through publish-subscribe messaging middleware, making it mobile and independent. As a result we can have multiple, distributed CODA run-control user interfaces attached to the same control system.
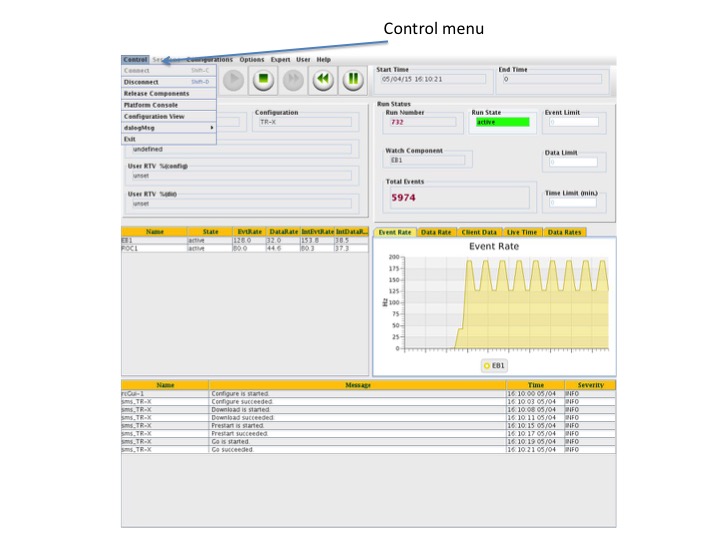
Running rcgui executable will start the CODA run-control user interface. The first menu that you will deal with is the Control Menu. This menu allows a user to
- Connect/disconnect to/from the supervisor agent of a control system.
-
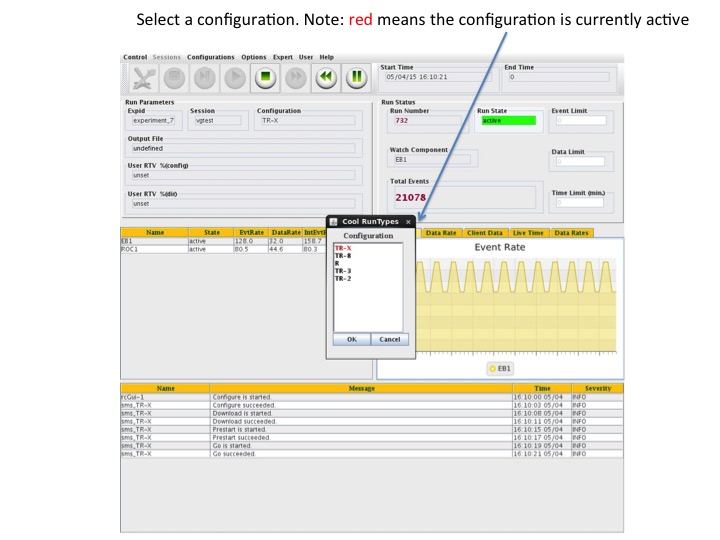
You always connect to a control system supervisor agent, which is the user- control interaction point. Supervisor agent gets commands from a user (for e.g. control tool bar button click) and orchestrates the control system state machine, as well as periodically reports state of the control system to connected users (run-control user interfaces). Recall that every control system has a name, which in the CODA language is called a run-type. Each run-type has a set of description files, written in COOL language, unfolding details of the control state machine, control-component configuration details, and etc. So, by choosing a run-type using the UI/rcGUI, and consequently connecting to it will establish human-control interface.
-
- Release CODA component agents from a specific control system.
- When we configure a control system (by clicking the
 Configure button of the UI control tool bar) Afecs platform will create and deploy a supervisor agent that will assume a managerial role of the control system. The first action by the supervisor agent is to create and deploy an agent for every physical component of a control system, telling them that they are part of a new control system (run-type) run by a specific user (or in CODA language: run in a specific session. See the immage titled "Choos the session to connect" of this document). Thus, agents and their physical components are bound to an explicit run-type and a session. So, the Release Components menu item will destroy this association.
- When we configure a control system (by clicking the
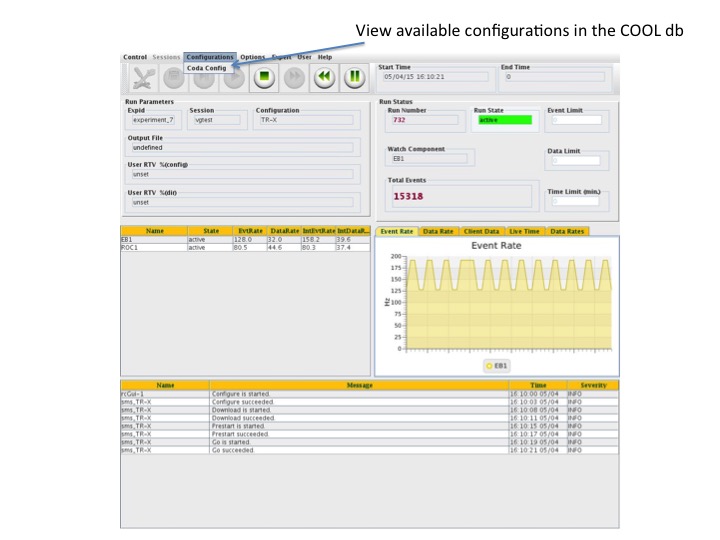
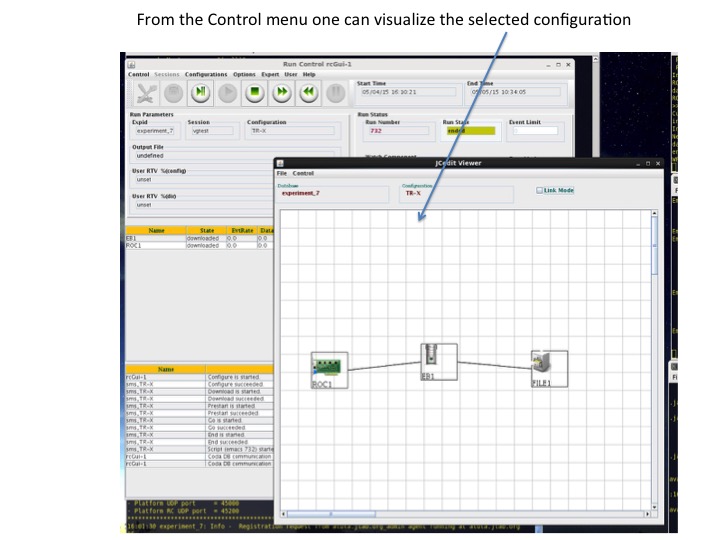
- View the selected control system (run-type) configuration details.
- This action will start Control Designer: JCedit in a read-only mode (see the image titled "From the Control menu one can visualize the selected configuration" of this document).
- This action will start Control Designer: JCedit in a read-only mode (see the image titled "From the Control menu one can visualize the selected configuration" of this document).
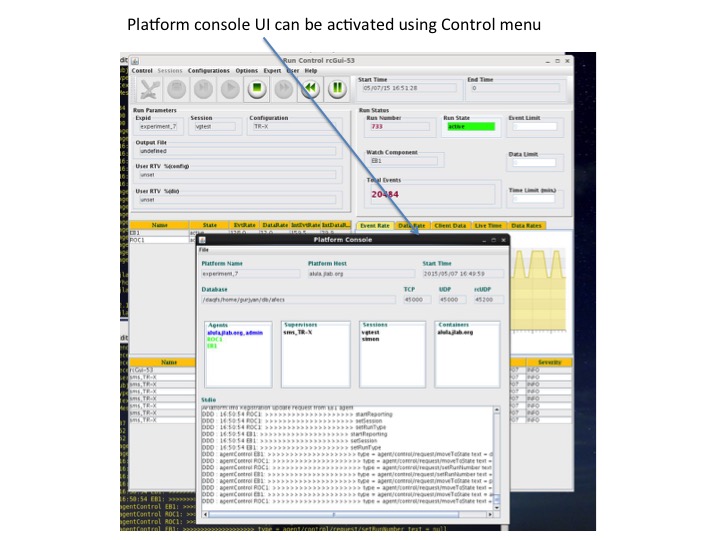
- Monitor CODA run-control system platform console printouts.
-
This action not only visualizes Afecs platform console but also presents platform details, such as the list of deployed agents and agent containers, supervisor agents, EXPID, COOL database location, communication ports and etc.
-
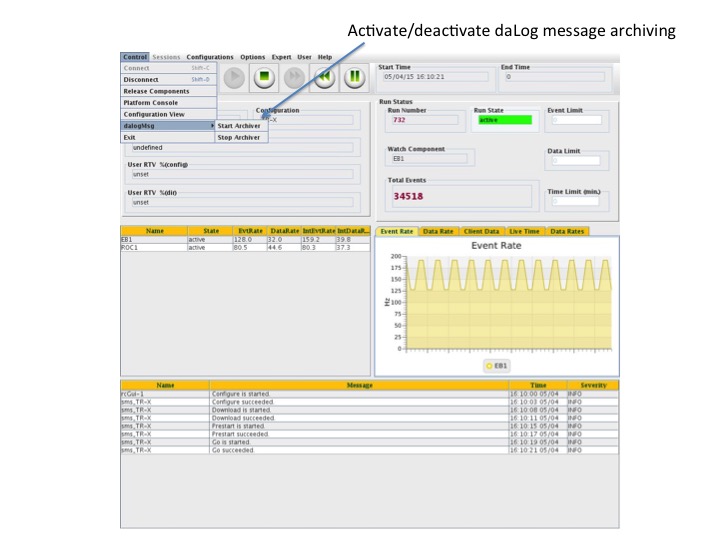
- Activate/deactivate daLog message archiving.
- daLog are data acquisition messages, generated by every CODA component ( physical as well as representative agents) based on a certain conditions.
Run-Type and Session
As was mentioned early run-type is the name of a control system that has a defined finite state machine, and set of member components. The state machine, as well as hierarchical component structure of a control system (including component configuration details) is described using COOL language instructions. Since at the top of the control hierarchy is the supervisor agent, it is logical to give the supervisor agent the same control system’s name (i.e. run-type).
Using the CODA session we define an arbitrary name space allowing us to run multiple concurrent run-types in a single Afecs platform. So, CODA and Afecs allow us simultaneously to run different run-types in different sessions. Yet, Afecs makes sure that the physical component is not shared between run-types causing unpredictable results. This means that components assigned to a session/user will stay bound until user will release (Control Menue Release Component menue item) component for other users to grab. However, physical components within the same session can be freely grabbed by the other run-type (by the supervisor agent) running in the same session.

The Options menu
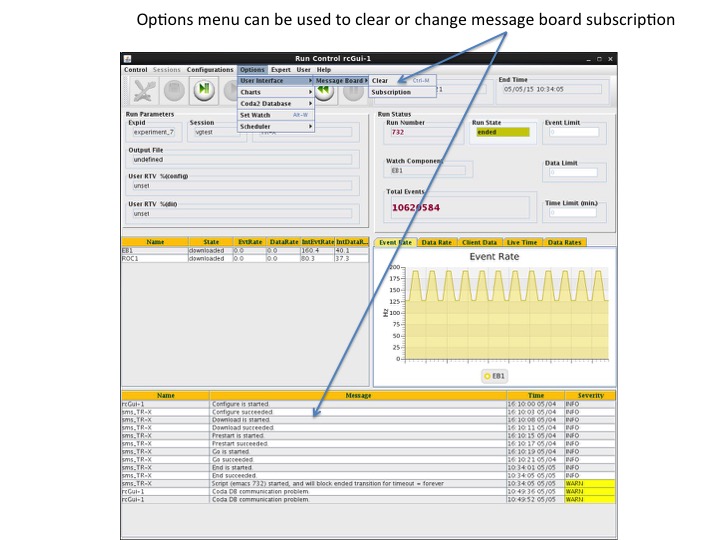
Coda run-control Options menu presents handful of useful functionalities. This pull-down menu displays a list of run-control function extensions and system services, such as a process of scheduling consequent runs, monitoring specific component, controlling charts and message board, etc.
User potentially can eavesdrop to another data acquisition running in the Afecs platform, without interrupting monitoring and controlling the current run-type control. The new run-type log messages will show up together with the main run-type messages. This arguably useful feature is there for you to use, comment, or just simply ignore.
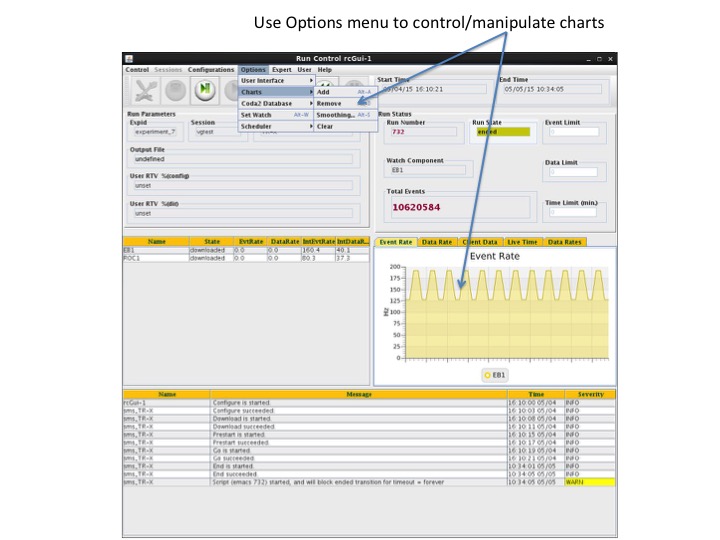
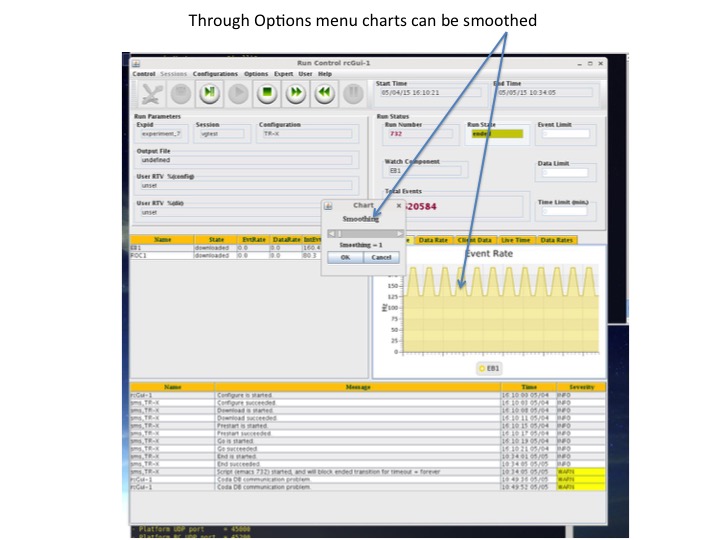
The Charts menu item enables a user to visualize component specific event-rate and data-rate parameters over time. Selecting appropriate tab of the chart display does select the desire parameter, while component selection is done using Component Table. Component table is positioned to the left of the chart display. This table contains the list of all CODA components, participating to the data production process. Clicking on one of the rows of the Component Table will select a particular component for visualization on the Chart Display. Note that charts of multiple components can be overlaid.
The feature to convert Coda-2 database configuration information into the COOL description is deprecated and will not be part of the UI in the next Afecs release.

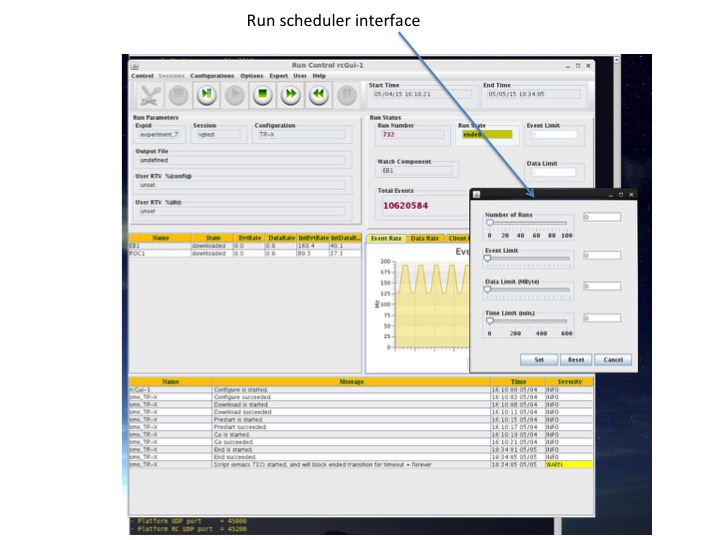
How to schedule a data acquisition workflow?
The Coda run-control scheduler is an automated control workload organizer. The workload is a set of runs running one after another. To schedule a workload a simple interface helps a user to define the number of runs to be sequentially executed, and conditions to be met in order to end a run. The following conditions can be programmed
- Event limit
- The total number of events, seen by the selected monitor component, to end the run
- Data limit
- Accumulated data volume, being read out from the selected component, to trigger the run-control End transition
- Time limit
- Desired elapsed time of the run
Note that component attached synchronous processes/scripts will halt the scheduled workflow, so in those cases user assistance is required for the proper functionality of the scheduler.

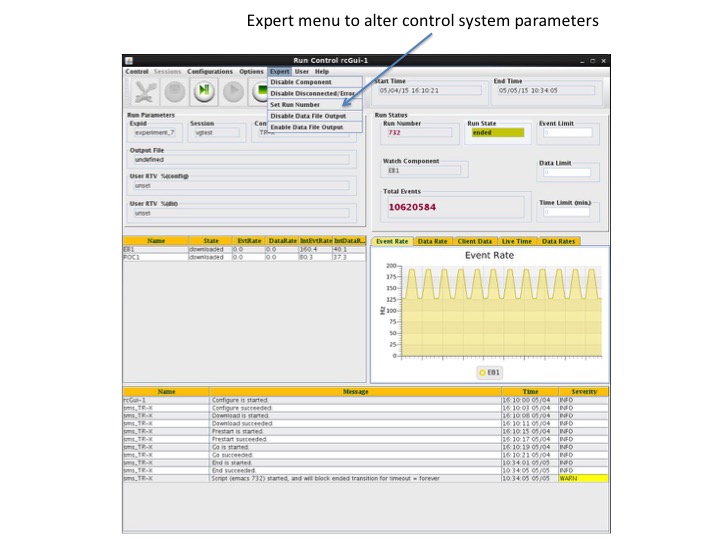
Expert menu
The Expert menu of the run-control user interface presents functionalities that can potentially harm or significantly alter the data acquisition process. So, use caution when exercising these functionalities. The following are services presented by the Expert menu.
- Disable Component
- Any run-control component can be disabled, or be removed from the control state machine. After component is disabled, supervisor agent will stop monitoring and altering the state of the control system, based on the state of the disabled/removed component. Selection of the component is done using the Component Table (Note: component specific table raw is an active selection point).
- Disable Disconnected/Error
- During the active run-control process some of the component agents will loos connection with their physical agents, primarily due to the crash of the physical component (for e.g. ROC or EB). In this case agent will switch it’s state to “disconnected”. In some other cases physical component will report an “error” to it’s representative agent, that will in turn set it’s own state to “error”. In these scenarios this expert menu-item will remove all disabled or in error state agents from the control state machine.
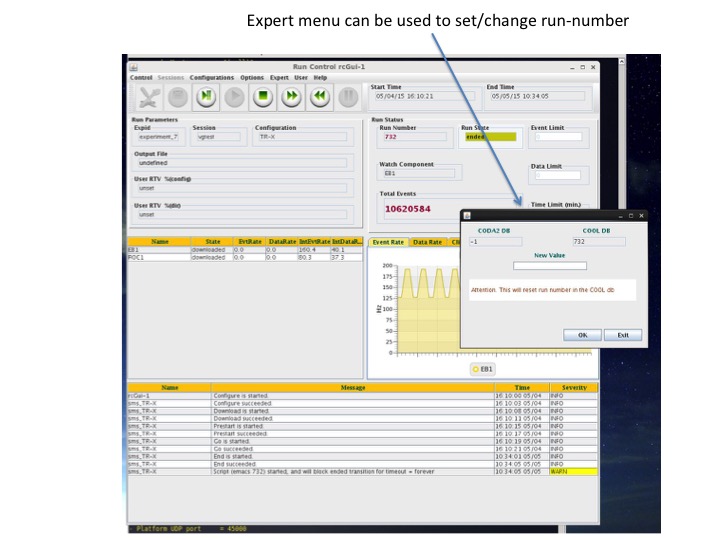
- Set Run Number
- Run number is a precarious identification for the produced data, and changing it can cause confusion during the off-line analyses process.
- Disable/Enable Data File Output
Disabling faulty components is essential for proper ending a run in case some of the run-control critical components stop reporting. It is also important to keep taking data in case some of the data production non-critical components sized functioning.
User menu
The User menu is the window into the run-control environment. Afecs run-control defines a set of system variables (system RTV: Run Time Variables) available at runtime to user external processes, such as Epics based slow control professes, run condition defininition and monitoring processes, and etc. This link is bidirectional. User can define and assign arbitrary number of variables (user RTV) and pass them to the control system. These user RTVs will be used by the control system to micromanage user external processes. We have more on RTVs in the section describing CODA Control Designer.
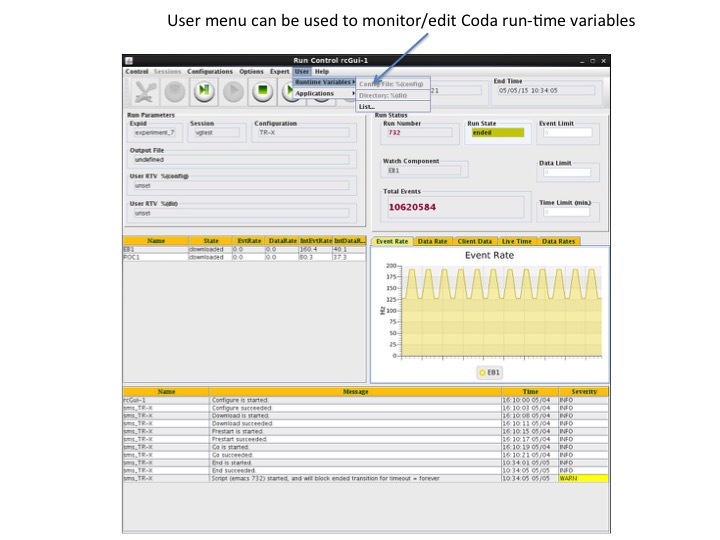
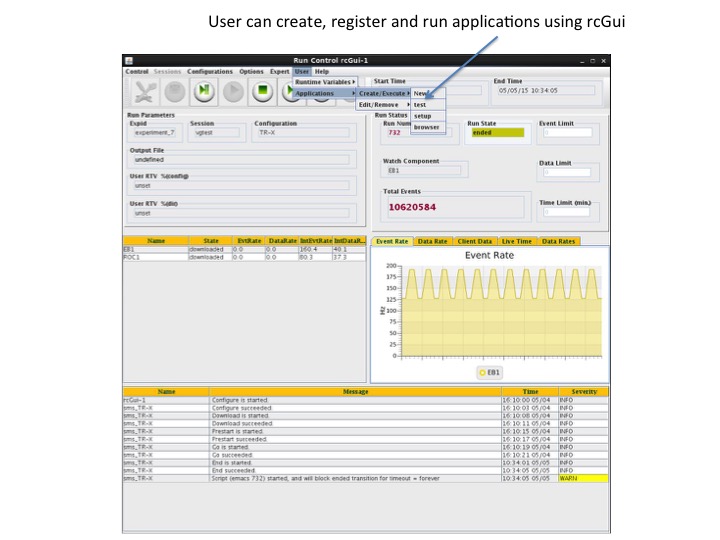
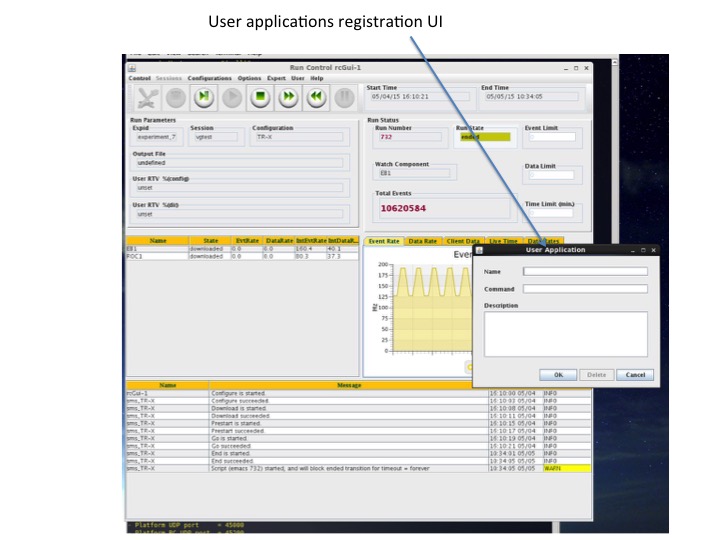
The User menu can be used to create, register and manage user external applications, such as slow control, histogram monitor, data quality check, and etc. These registered applications can be executed using the start/stop menu item of the User menu. This is a mechanism to organize and execute online process management system within the Afecs run-control system.
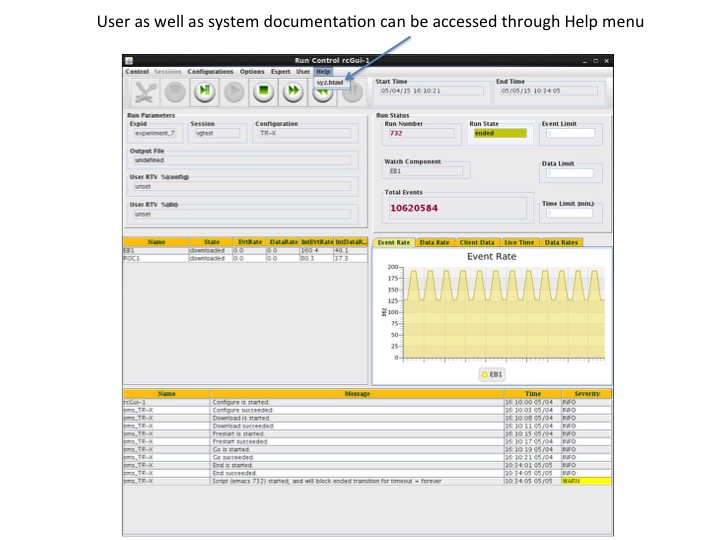
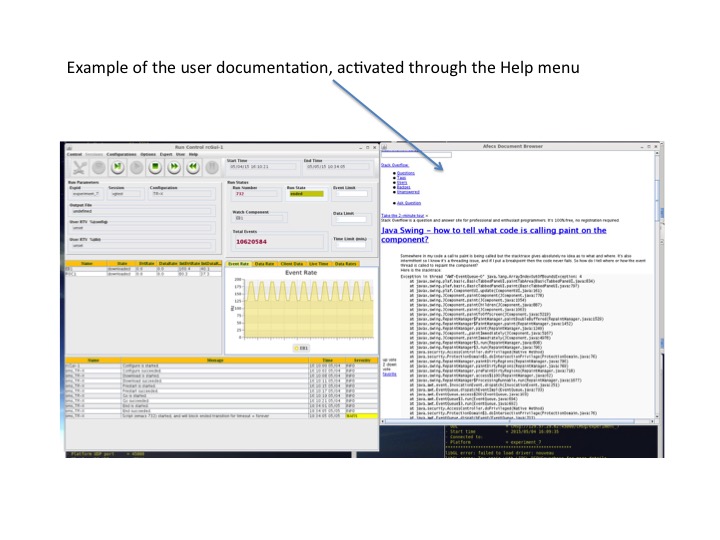
Help menu
The Help menu is a placeholder for user documentations. Run-control presents a useful mechanism that is capable of rendering arbitrary text and HTML documents on the run-control user interface. So, by registering user documentations with the run-control we will build an online document management system that will allow shift operator to access all documents in one place.