CODA 3 Installation Walk-through
Table of Contents
1. Intro
The following guide to CODA 3 contains the steps I took to install CODA 3.10 on my RHEL 7.9 PC. Here you will find basic information that will help you with environment setup, database configuration, and taking then decoding the data from a local ROC.
2. Download and Install
2.1. CODA 3.10
Download and install the latest CODA 3 tarball https://coda.jlab.org/drupal/content/coda-3-release
- Here, I made a directory (
$HOME/coda) and extracted CODA 3.10 into it.
mkdir $HOME/coda
tar zxvf coda310_arm-2.tgz -C $HOME/coda
This extracts the CODA 3.10 into CODA=$HOME/coda/coda3.10_arm. This info will be added below.
2.2. JDK1.8.0_152
Download and install this version of the jdk: https://coda.jlab.org/drupal/system/files/coda/3.10/jdk-8u152-linux-x86.tar.gz
- I installed this in
HOMEas well:
tar zxvf jdk-8u152-linux-x86.tar.gz -C $HOME
This extracts the jdk into JAVA_HOME=$HOME/jdk1.8.0_152. This info
will be added below.
2.3. coda_scripts and CODA 3 environment
Follow the README.md for coda_scripts installation. These instructions include steps for setting up the CODA 3 environment. https://github.com/JeffersonLab/coda_scripts/blob/master/README.md
- I cloned the git repo in my
CODAdirectory
cd ${HOME}/coda
git clone https://github.com/JeffersonLab/coda_scripts
- Since I use bash, I modified the
coda_scripts/setupCODA.bashto read:
# Where I installed stuff
export JAVA_HOME=$HOME/jdk1.8.0_152
export CODA=$HOME/coda/3.10_arm
export CODA_CONFIG=$HOME/coda/coda_scripts

# Add config scripts to path
export PATH=${CODA_CONFIG}:${PATH}

# CODA 3 environment defaults
source ${CODA_CONFIG}/coda3.10.setup_bash

# Override some defaults
export SESSION=testsession
export EXPID=testexpid

export COOL_HOME=${CODA}/cool

export REMEX_CMSG_HOST=dharma.jlab.org
export REMEX_CMSG_PASSWORD=${EXPID}

export CODA_COMPONENT_TABLE=${CODA_CONFIG}/config/${EXPID}/coda_component_table.cfg
Be sure and update CODA, JAVA_HOME, and CODA_CONFIG to the paths where you have installed them. You're free to change the SESSION and EXPID to your own naming scheme. Change the REMEX_CMSG_HOST to match the hostname of your machine.
- Now this file is sourced in my
$HOME/.bashrc:
source $HOME/coda/coda_scripts/setupCODA3.bash
3. Test Configuration
Now I'll test my installation by running a ROC and PEB on the PC. It'll generate some data and I'll use some CODA 3 utilities to look at the resulting data file.
3.1. Setup coda component table
The CODA_COMPONENT_TABLE environment variable was created in setupCODA.bash. Now I'll make one that defines a ROC (named ROC1) and PEB (named PEB1) that will run on my PC (short hostname: dharma):
#
#  coda_scripts/config/testexpid/coda_component_table.cfg
#
# hostname   component type    component name
#
dharma  ROC  ROC1
dharma  PEB  PEB1
3.2. Setup test configuration with jcedit
3.2.1. Start jcedit
With the CODA 3 environment defined, we can now run CODA 3 utilities. In a fresh terminal I execute jcedit:
jcedit
A pop-up window appears with:
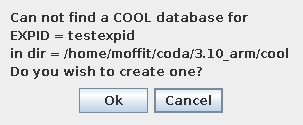
I clicked on the Ok button and the pop-up disappears. This has created a directory structure with the COOL database at COOL_HOME
The COOL Database Editor with a blank canvas appears:
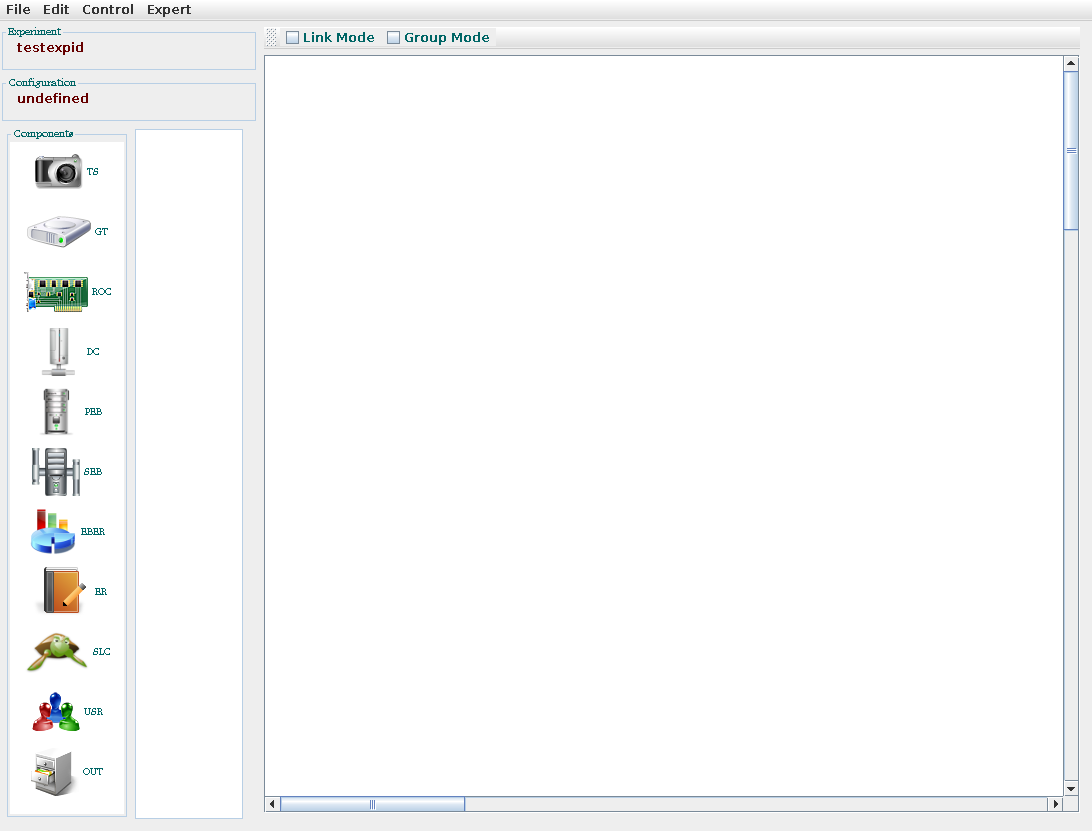
3.2.2. Create a new SESSION
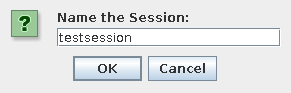
At the top of the jcedit GUI, I selected from the pull-down menu: Expert -> Session -> New…
A pop-up window appeared, I entered in my SESSION=testsession, and clicked OK:
3.2.3. Create a new CODA configuration
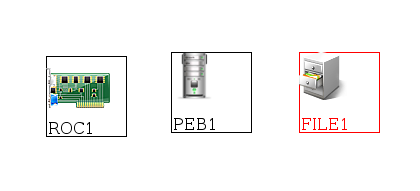
Now ready to make the test configuration, I did a click-and-drag on the ROC icon from the component column on the left of the GUI. ROC1 then appeared in the canvas.
I did the same with the PEB icon, and OUT icon. The canvas now looked like:
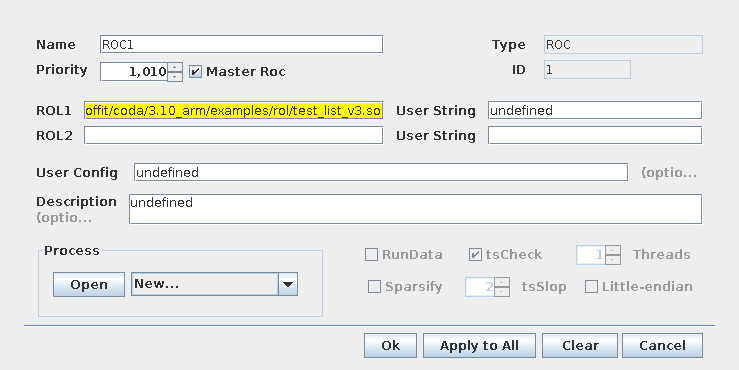
Double-clicking on a component in the canvas allows you to set them up for this configuration. For ROC1 I configured a test readout list
/home/moffit/coda/3.10_arm/examples/rol/test_list_v3.so
in the ROL1 field:
The FILE1 component was configured to generate an output Type=File:
/home/moffit/coda/data/testconfig_%d.evio.%d
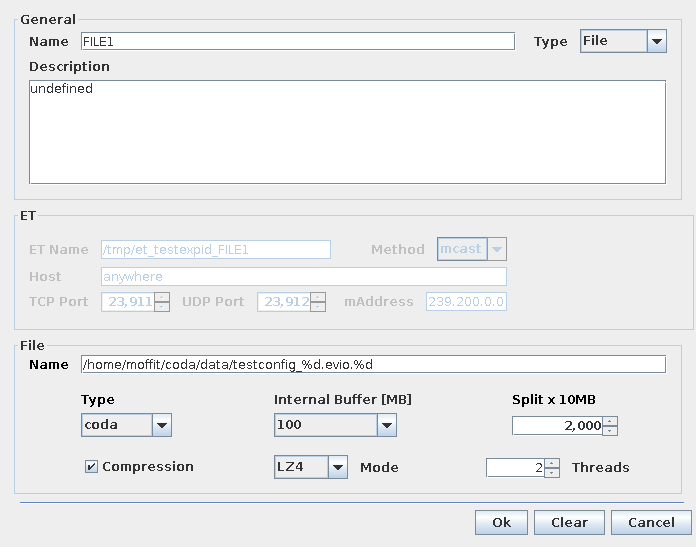
With this configuration, the first %d will be replaced with the current run number and the second %d replaced with the current split number.
Now I linked ROC1 to PEB1 by selecting the Link Mode:
then click-and-drag from one to the other. A pop-up window will show some various options for this link. The defaults are fine, and I just clicked Ok. I did the same procedure for linking the PEB1 to the FILE1. Again, the link defaults were fine and I clicked Ok.
My canvas now looked like:
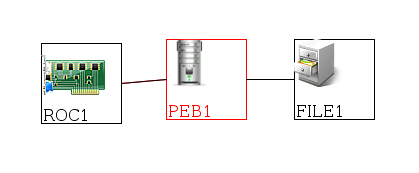
I then saved this configuration using the Pull-Down menu: File -> Save
A pop-up window appeared, I entered testconfig, and clicked OK:

All done. I closed the GUI with the Pull-Down menu: File -> Exit
3.3. Compile example readout list
In a terminal, I changed directories into $CODA/examples/rol and compiled the test readout list.
cd $CODA/examples/rol
make test_list_v3.so
3.4. startCoda
In a terminal, now I ran:
startCoda
Three xterms should appear with the Platform, PEB1, and ROC1. The RunControl GUI appeared shortly afterwards:
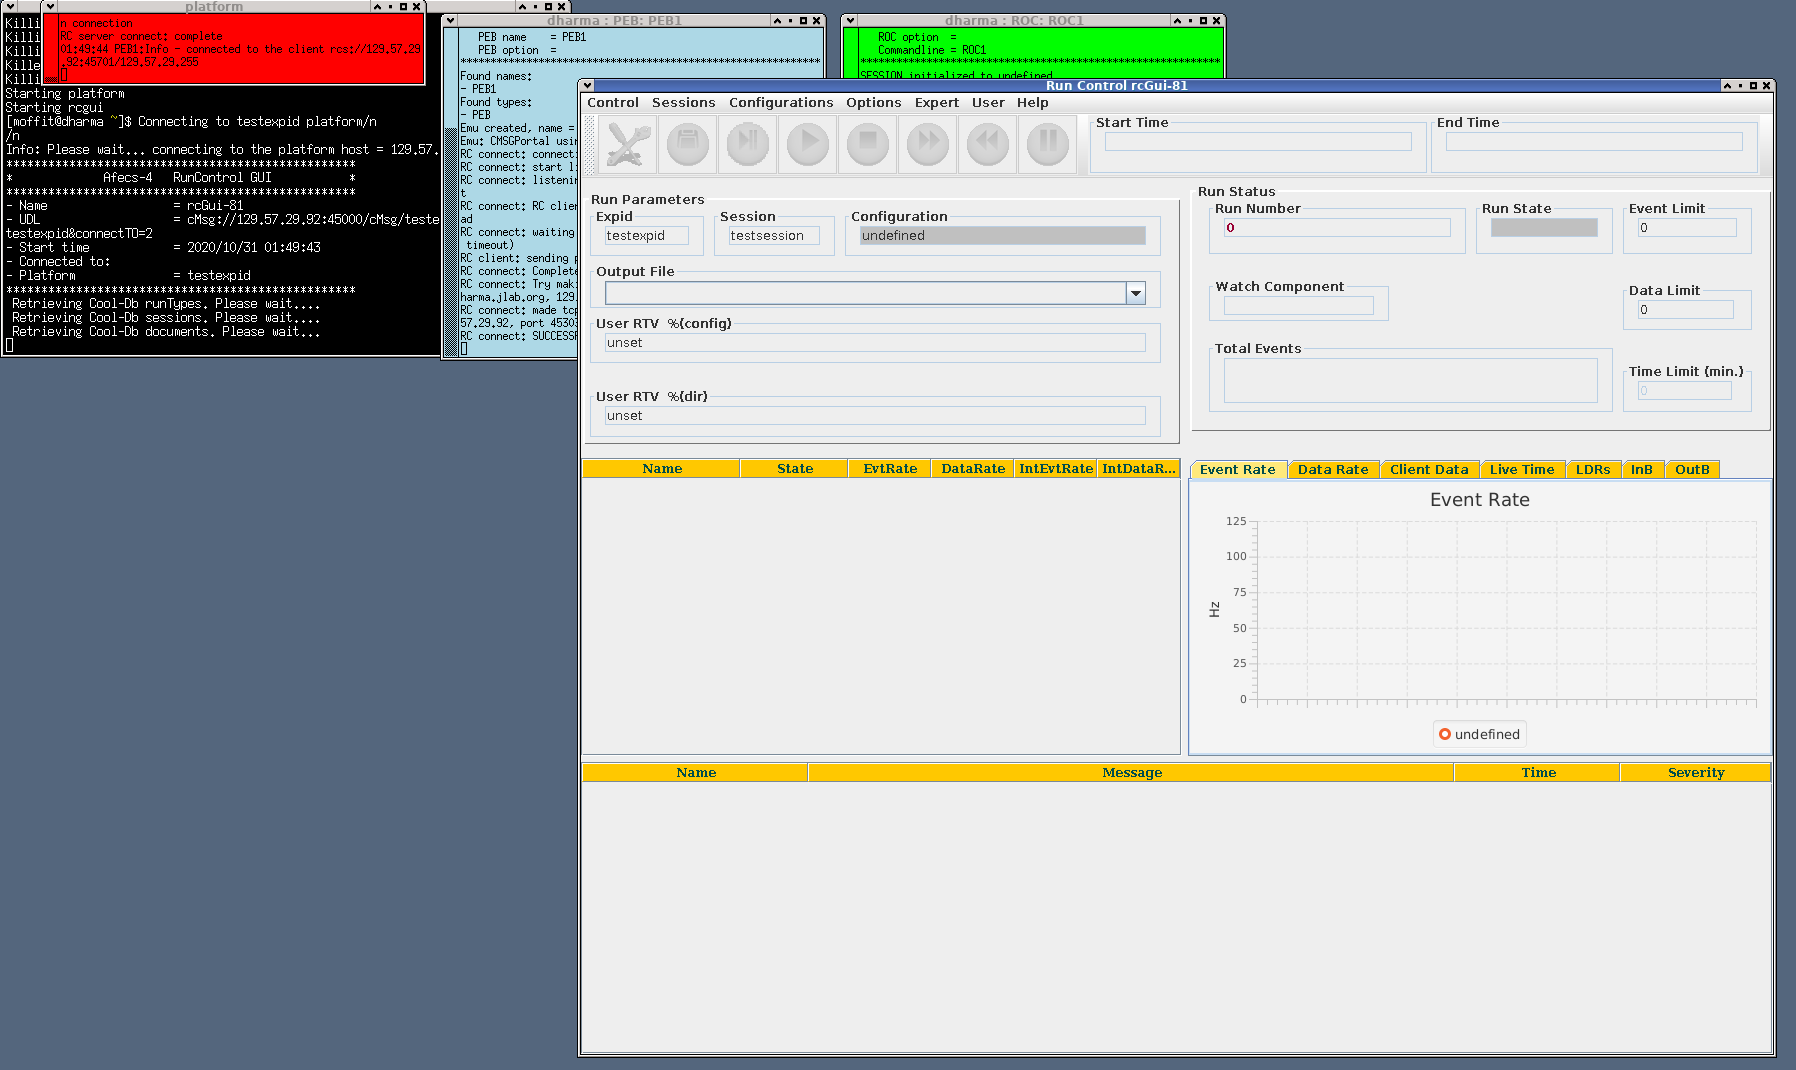
In the top of Run Control, I select: Configurations -> Coda Config, and select testconfig. The GUI should re-configure and now show ROC1 and PEB1 in a booted state.
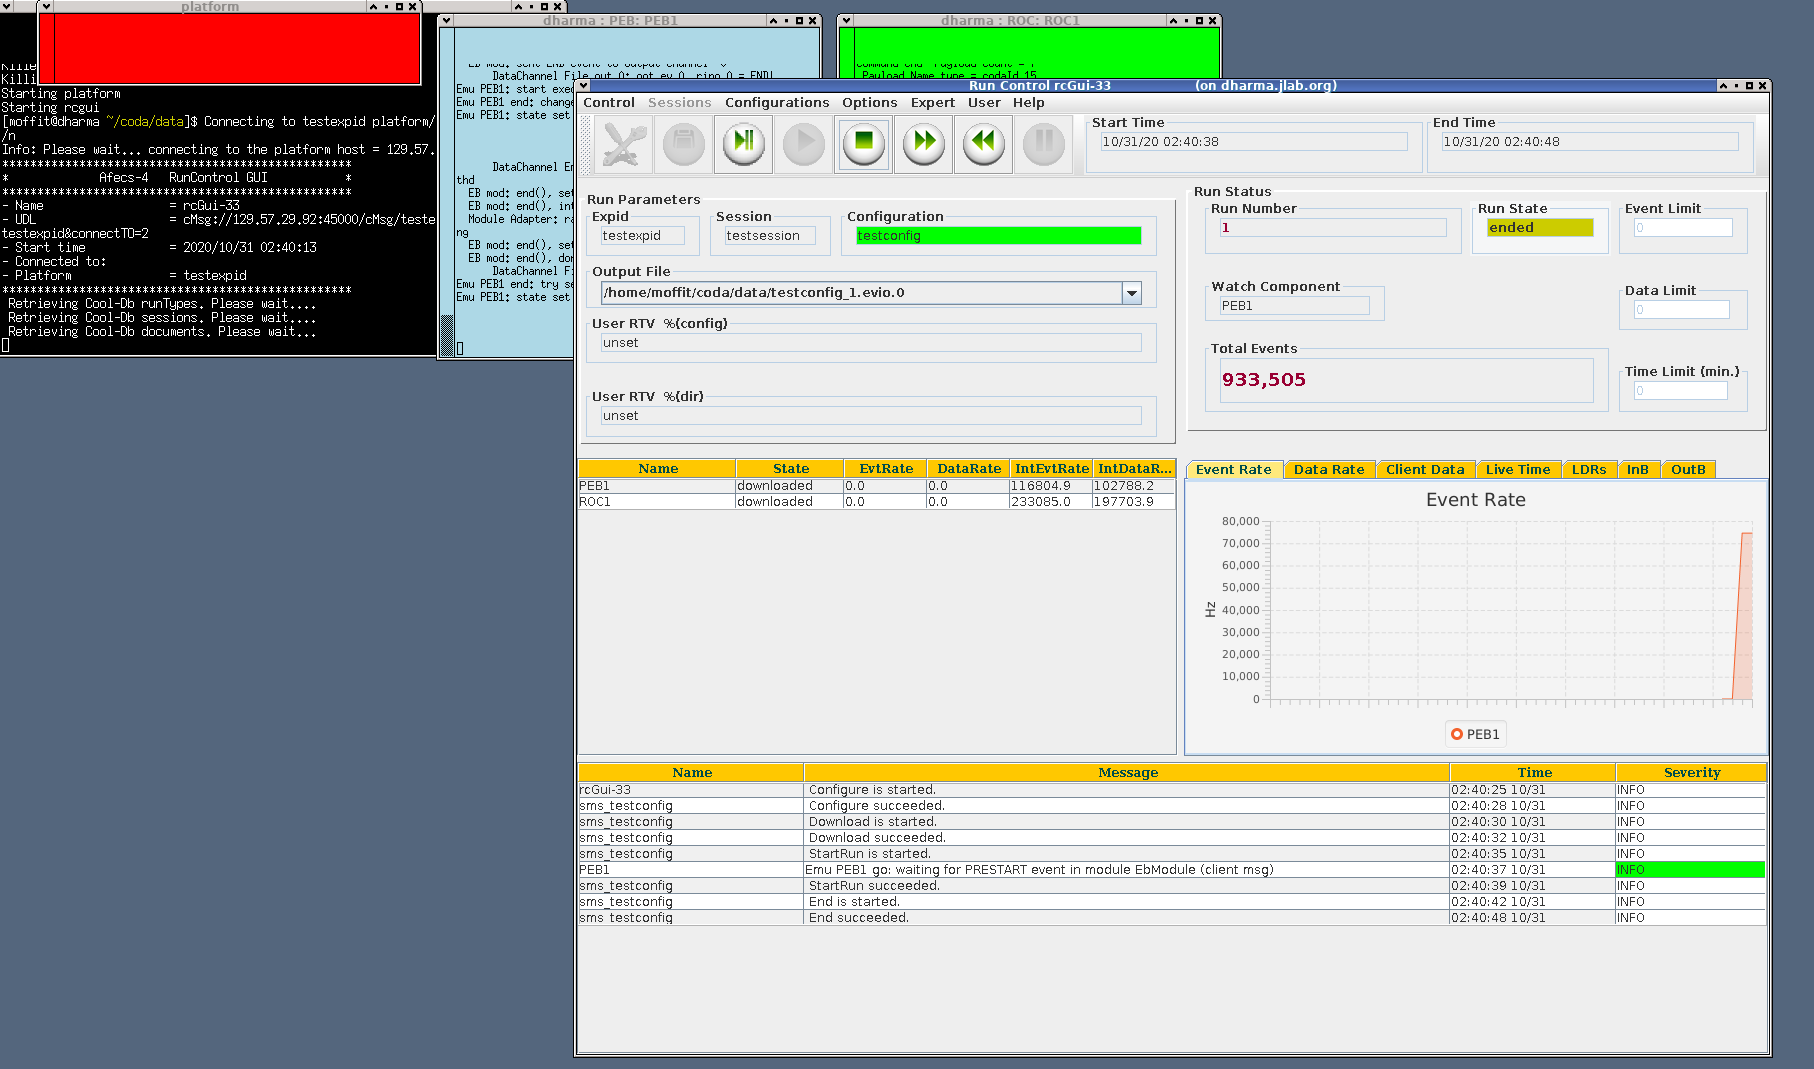
3.4.1. Take a run
Click on Configure button. Then Download, Then Start.
End
3.5. Look at the data output
3.5.1. jeviodmp
I opened up a fresh terminal, and ran the program:
jeviodmp
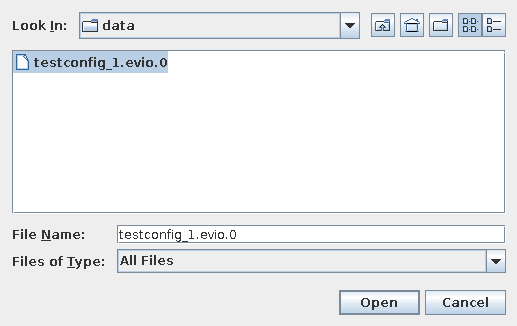
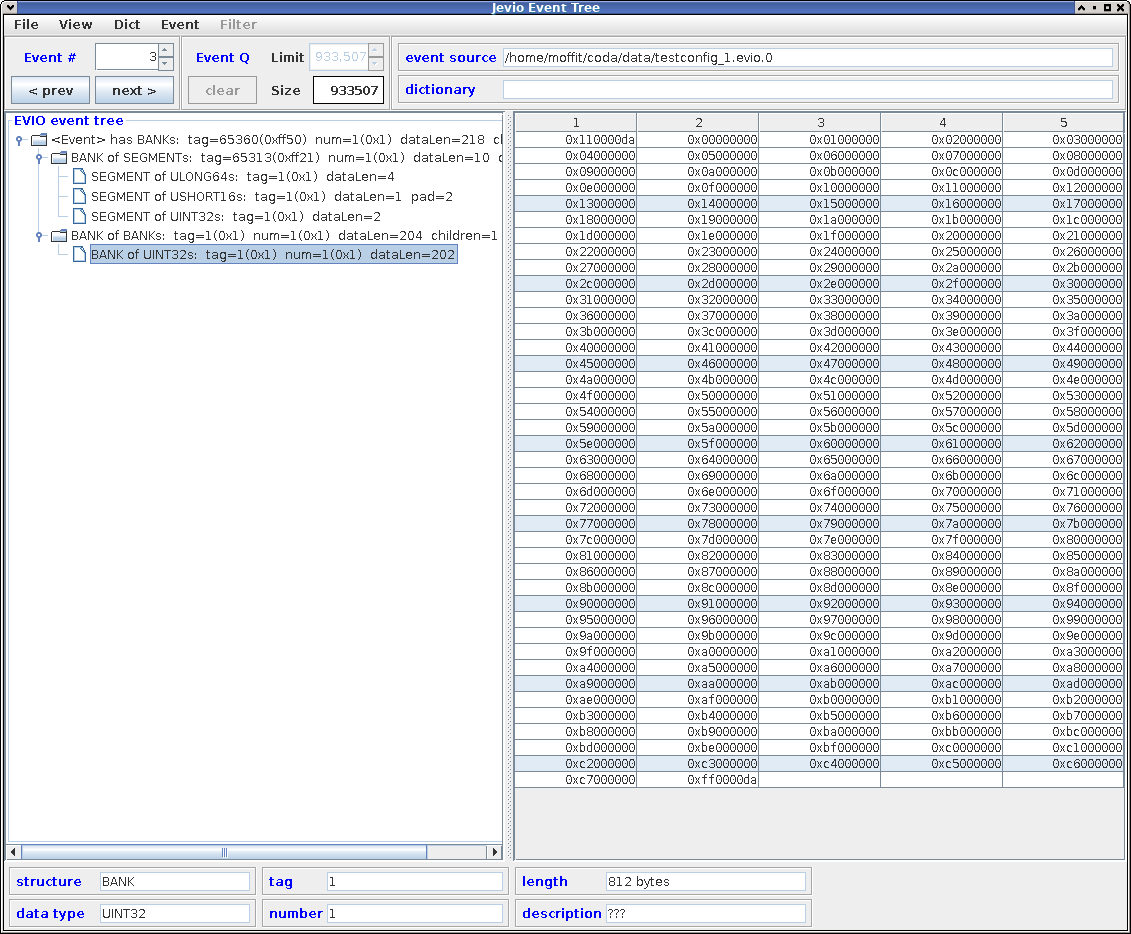
This brings up the GUI that allows you to view the data for each event within a CODA 3 run. I navigated to find my data file by using the Pull-down menu: File -> Open Event File, then used the pop-up window to find the file for the run I just took:
I chose to view the data in hexidecimal. This is selected using the pull-down: View -> Hexidecimal. The first two events are the Prestart and Go CODA events. You can navigate to the first triggered event by using the next> button:
3.5.2. evio2xml
I opened up a fresh terminal, navigated to my data directory and ran the program:
cd ~/coda/data/
evio2xml -verbose -pause testconfig_1.evio.0
This produced some output into the terminal that has the EVIO data format converted to XML. I pressed <Enter> a couple times to advance to the first triggered event:
<!-- ===================== Buffer 3 contains 220 words (880 bytes) ===================== -->

   <!-- header words: 219, 0xff501001 -->
   <event format="evio" count="3" content="bank" data_type="0x10" tag="65360" padding="0" num="1" length="219" ndata="218">

      <!-- header words: 11, 0xff212001 -->
      <bank content="segment" data_type="0x20" tag="65313" padding="0" num="1" length="11" ndata="10">

         <!-- header word: 0x10a0004 -->
         <uint64 data_type="0xa" tag="1" padding="0" length="4" ndata="2">
            0x0000000000000001  0x0000000012345678
         </uint64>

         <!-- header word: 0x1850001 -->
         <uint16 data_type="0x5" tag="1" padding="2" length="1" ndata="1">
            0x0001
         </uint16>

         <!-- header word: 0x1010002 -->
         <uint32 data_type="0x1" tag="1" padding="0" length="2" ndata="2">
            0x12345678  0x00000000
         </uint32>
      </bank>

      <!-- header words: 205, 0x11001 -->
      <bank content="bank" data_type="0x10" tag="1" padding="0" num="1" length="205" ndata="204">

         <!-- header words: 203, 0x10101 -->
         <uint32 data_type="0x1" tag="1" padding="0" num="1" length="203" ndata="202">
            0x110000da  0x00000000  0x01000000  0x02000000
            0x03000000  0x04000000  0x05000000  0x06000000
            0x07000000  0x08000000  0x09000000  0x0a000000
            0x0b000000  0x0c000000  0x0d000000  0x0e000000
            0x0f000000  0x10000000  0x11000000  0x12000000
            0x13000000  0x14000000  0x15000000  0x16000000
            0x17000000  0x18000000  0x19000000  0x1a000000
            0x1b000000  0x1c000000  0x1d000000  0x1e000000
            0x1f000000  0x20000000  0x21000000  0x22000000
            0x23000000  0x24000000  0x25000000  0x26000000
            0x27000000  0x28000000  0x29000000  0x2a000000
            0x2b000000  0x2c000000  0x2d000000  0x2e000000
            0x2f000000  0x30000000  0x31000000  0x32000000
            0x33000000  0x34000000  0x35000000  0x36000000
            0x37000000  0x38000000  0x39000000  0x3a000000
            0x3b000000  0x3c000000  0x3d000000  0x3e000000
            0x3f000000  0x40000000  0x41000000  0x42000000
            0x43000000  0x44000000  0x45000000  0x46000000
            0x47000000  0x48000000  0x49000000  0x4a000000
            0x4b000000  0x4c000000  0x4d000000  0x4e000000
            0x4f000000  0x50000000  0x51000000  0x52000000
            0x53000000  0x54000000  0x55000000  0x56000000
            0x57000000  0x58000000  0x59000000  0x5a000000
            0x5b000000  0x5c000000  0x5d000000  0x5e000000
            0x5f000000  0x60000000  0x61000000  0x62000000
            0x63000000  0x64000000  0x65000000  0x66000000
            0x67000000  0x68000000  0x69000000  0x6a000000
            0x6b000000  0x6c000000  0x6d000000  0x6e000000
            0x6f000000  0x70000000  0x71000000  0x72000000
            0x73000000  0x74000000  0x75000000  0x76000000
            0x77000000  0x78000000  0x79000000  0x7a000000
            0x7b000000  0x7c000000  0x7d000000  0x7e000000
            0x7f000000  0x80000000  0x81000000  0x82000000
            0x83000000  0x84000000  0x85000000  0x86000000
            0x87000000  0x88000000  0x89000000  0x8a000000
            0x8b000000  0x8c000000  0x8d000000  0x8e000000
            0x8f000000  0x90000000  0x91000000  0x92000000
            0x93000000  0x94000000  0x95000000  0x96000000
            0x97000000  0x98000000  0x99000000  0x9a000000
            0x9b000000  0x9c000000  0x9d000000  0x9e000000
            0x9f000000  0xa0000000  0xa1000000  0xa2000000
            0xa3000000  0xa4000000  0xa5000000  0xa6000000
            0xa7000000  0xa8000000  0xa9000000  0xaa000000
            0xab000000  0xac000000  0xad000000  0xae000000
            0xaf000000  0xb0000000  0xb1000000  0xb2000000
            0xb3000000  0xb4000000  0xb5000000  0xb6000000
            0xb7000000  0xb8000000  0xb9000000  0xba000000
            0xbb000000  0xbc000000  0xbd000000  0xbe000000
            0xbf000000  0xc0000000  0xc1000000  0xc2000000
            0xc3000000  0xc4000000  0xc5000000  0xc6000000
            0xc7000000  0xff0000da
         </uint32>
      </bank>
   </event>

   <!-- end buffer 3 -->
This program has a number of useful features, including:
- save the output to file (
-out outfilename), - skip to specific events (
-skip skip_event), - pause after each event (
-pause)
4. External processes
Attaching an external process to a CODA state may help to monitor and display current run data. jcedit allows you to attach one before or after any component state (except for the FILE type).
CODA Users currently use this feature for:
- Start and End of Run logbook entries
- Run Information entry into an external database
- launch or reset of online data monitoring applications
4.1. Attach to the State
The Process box is where an external process is added or modified. Getting to this box depends on the type of Component to follow (e.g. Supervisor, ROC, PEB). Supervisor has different states to attach
4.1.1. Supervisor State
To attach to before or after a state, click on the Expert pull down menu from the main jcedit window and select Supervisor Process. A window will pop up showing the name of the current configuration (e.g. testconfig) with a Process box. The Process box has selection box that allows for creating (New…) or modifying the execution of an external process.
Expert -> Supervisor Process

4.1.2. Component State
For most components, the Process box is presented in it's configuration window:
4.2. Create a new Process
In the Process box, Select New… and click Open
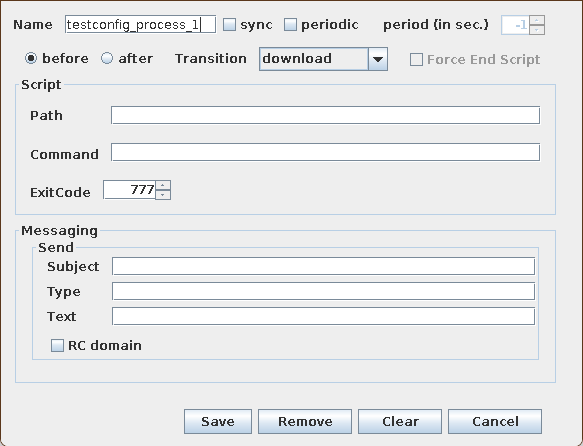
Name: Internal Name for the Process. The default will indicate the config or component name.sync: Enable/Disable wait for Command to end before continuingperiodic: Enable/Disable periodic execution, beginning at configured transitionTransition: Which state transition, available based on Supervisor/Component processSupervisor Component Download X X Prestart X X Go X X End X X Reset X Pause X Resume X Path: Path to executableCommand: Executable command, with or without argumentsExitCode: Compare executable return value to set value to determine if it was successful. Ignored if set to777. An error will be displayed in the platform text output.
4.2.1. Runtype Variables
Commandline arguments in Command can communicate run conditions. CODA3 maintains these Runtype variables that are resolved at runtime:
| %(rn) | Run Number |
| %(rt) | Runtype |
| %(session) | Session Name |
| %(udl) | cMsg connection information for component |
| %(config) | User Configuration Path |
| %(dir) | User Script Path |
| %(ddb) | Data Description Database Path |
4.2.2. Example
To try this out, I added the script below to my script path, and added these entries to testconfig_process_1
| Name | testconfig_process_1 |
| Path | /home/moffit/scripts |
| Command | example_shell_process.sh %(rt) %(rn) PRESTART |
| Transition | after - prestart |
testconfig_process_2
| Name | testconfig_process_2 |
| Path | /home/moffit/scripts |
| Command | example_shell_process.sh %(rt) %(rn) RESET |
| Transition | before - reset |
testconfig_process_3
| Name | testconfig_process_3 |
| Path | /home/moffit/scripts |
| Command | example_shell_process.sh %(rt) %(rn) END |
| Transition | after - end |
After saving each, I clicked Apply to apply these to the current configuration testconfig.
Be sure to save the configuration.
If the rcgui was still running, reset and re-select the Cool Runtypes window (Configurations->Coda Config).
- shell script
- here's a simple shell script that just pipes the arguments to an output file
#!/bin/bash

# Redirect all output to logfile
LOG_FILE=/tmp/example_log_file.txt
exec >> $LOG_FILE 2>&1

RunType=$1
RunNumber=$2
RunState=$3

date
echo "$0: "
echo "   RunType   = $RunType"
echo "   RunNumber = $RunNumber"
echo "   RunState  = $RunState"
4.2.3. Caveats
- output is not redirected well from Java.Fork execution on the platform
- best to redirect output to file within script/program
5. Changelog
- 27jan2027: Updated html format, add external process section
- 16nov2020: Updated coda 3 tarball name to current:
coda3.10_arm-2.tgz - 6nov2020: Updated coda 3 tarball name to current:
coda3.10_arm-1.tgz